Register
Register Page Screen
Anytime you are logged into VMX POS, you can click the "Register" button on the black ribbon on the top of the page.
The Register page is where all sales are tendered. You can also compile quotes, see who is clocked in, email customers, estimate delivery prices, and search customers, items on hand and out of stock items.
Tip
To unlock all the features of the Register page, enter your employee number, followed by the “-” symbol or clicking the “Emp #” button on the right hand panel.
Configuration Page
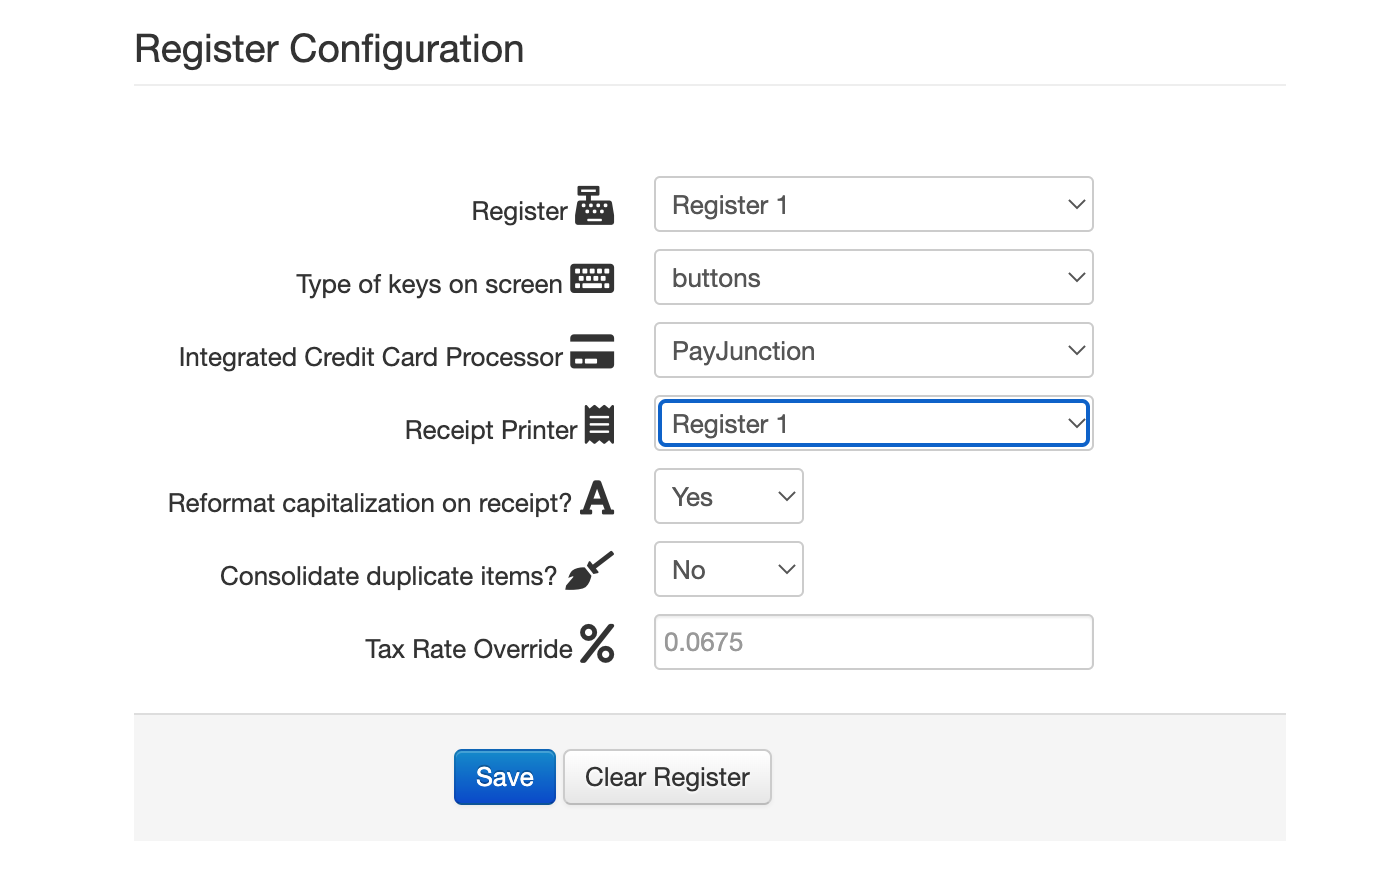
- Select the appropriate register number for the computer you are at.
- Select Save
- To see more feature of the configuration page, visit the "Register Configuration" tutorial
Enter your employee ID and then hit the “-“ key or click EMP # on the right hand panel on the screen, to unlock all of the register features.
What's on the Page?
Screensaver- If your store has a screensaver image configured and the Register page sits idle for about two minutes, the screensaver overlays the screen.
- To remove the screensaver, move your mouse over the page, or press any key on the keyboard.
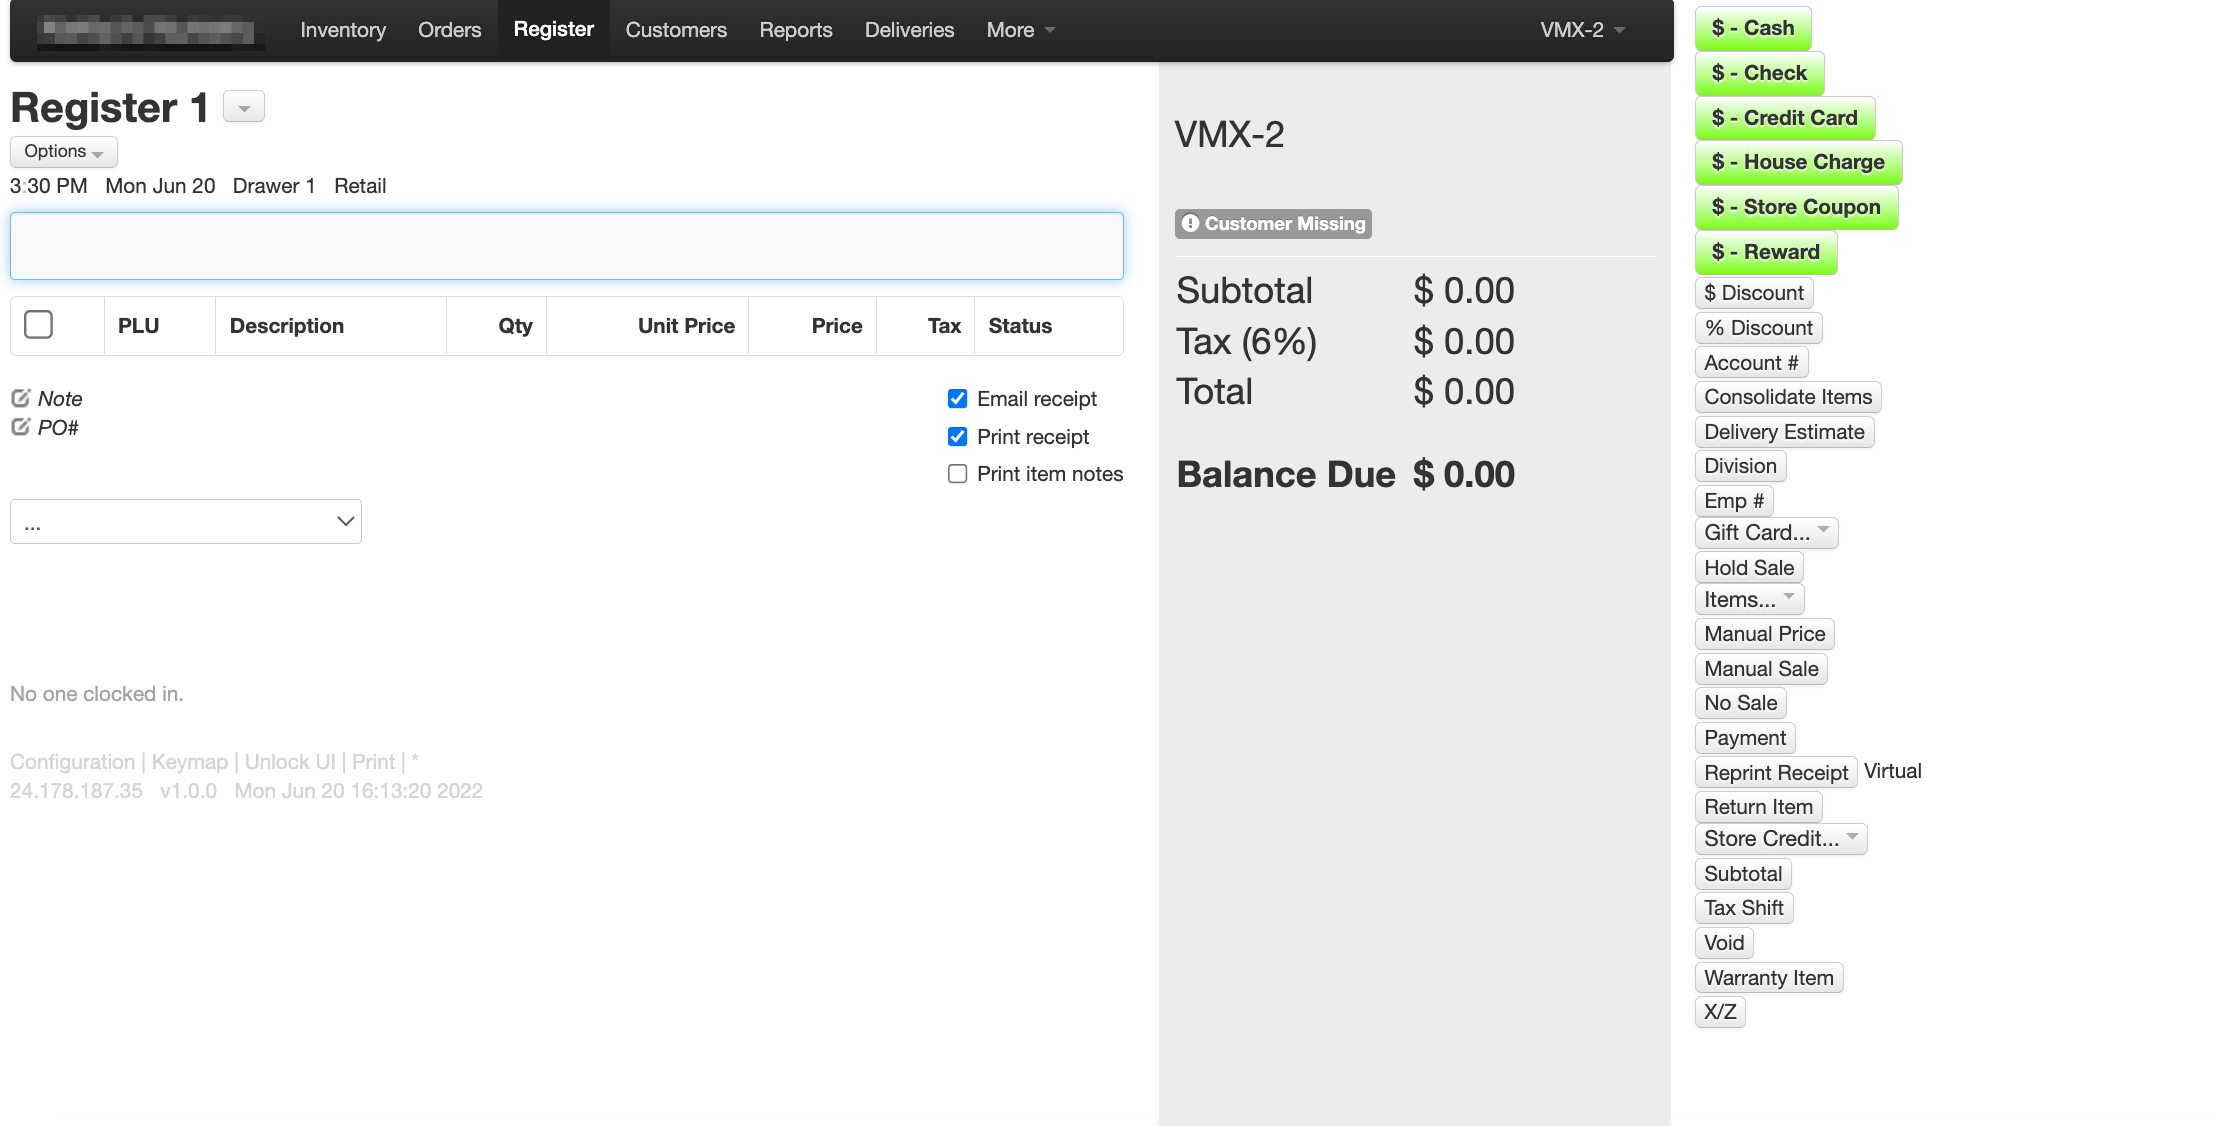
Register Name- The top left corner of the page will indicate which Register you will be making sales on. The small dropdown arrow next to the register name opens a menu with additional tools, including X/Z, No Sale, Find Receipt (see Find Receipt), and Configuration.
Options- When no sale is on the screen, an Options dropdown appears below the Register Name with Email…, Division…, and Reprint.
- If a sale is already posted, the Options button is replaced with a Receipt # button showing the receipt number. Its menu includes Email…, Reprint, Print Popup…, Division…, Print Full Page…, Print Gift Receipt…, and Copy Receipt #. Next to this button, the page shows the time of the sale and the employee who posted it.
- If a sale is in progress, the button reads In Progress and its menu includes Email quote…, Division…, Print quote, Print Popup…, Print Full Page…, and Clear.
Status- Below the “Options” button, are the current time, the date, the name of the cash drawer you are making transactions with, and the division of the company you are making sales under.
Register Search Bar
Tip
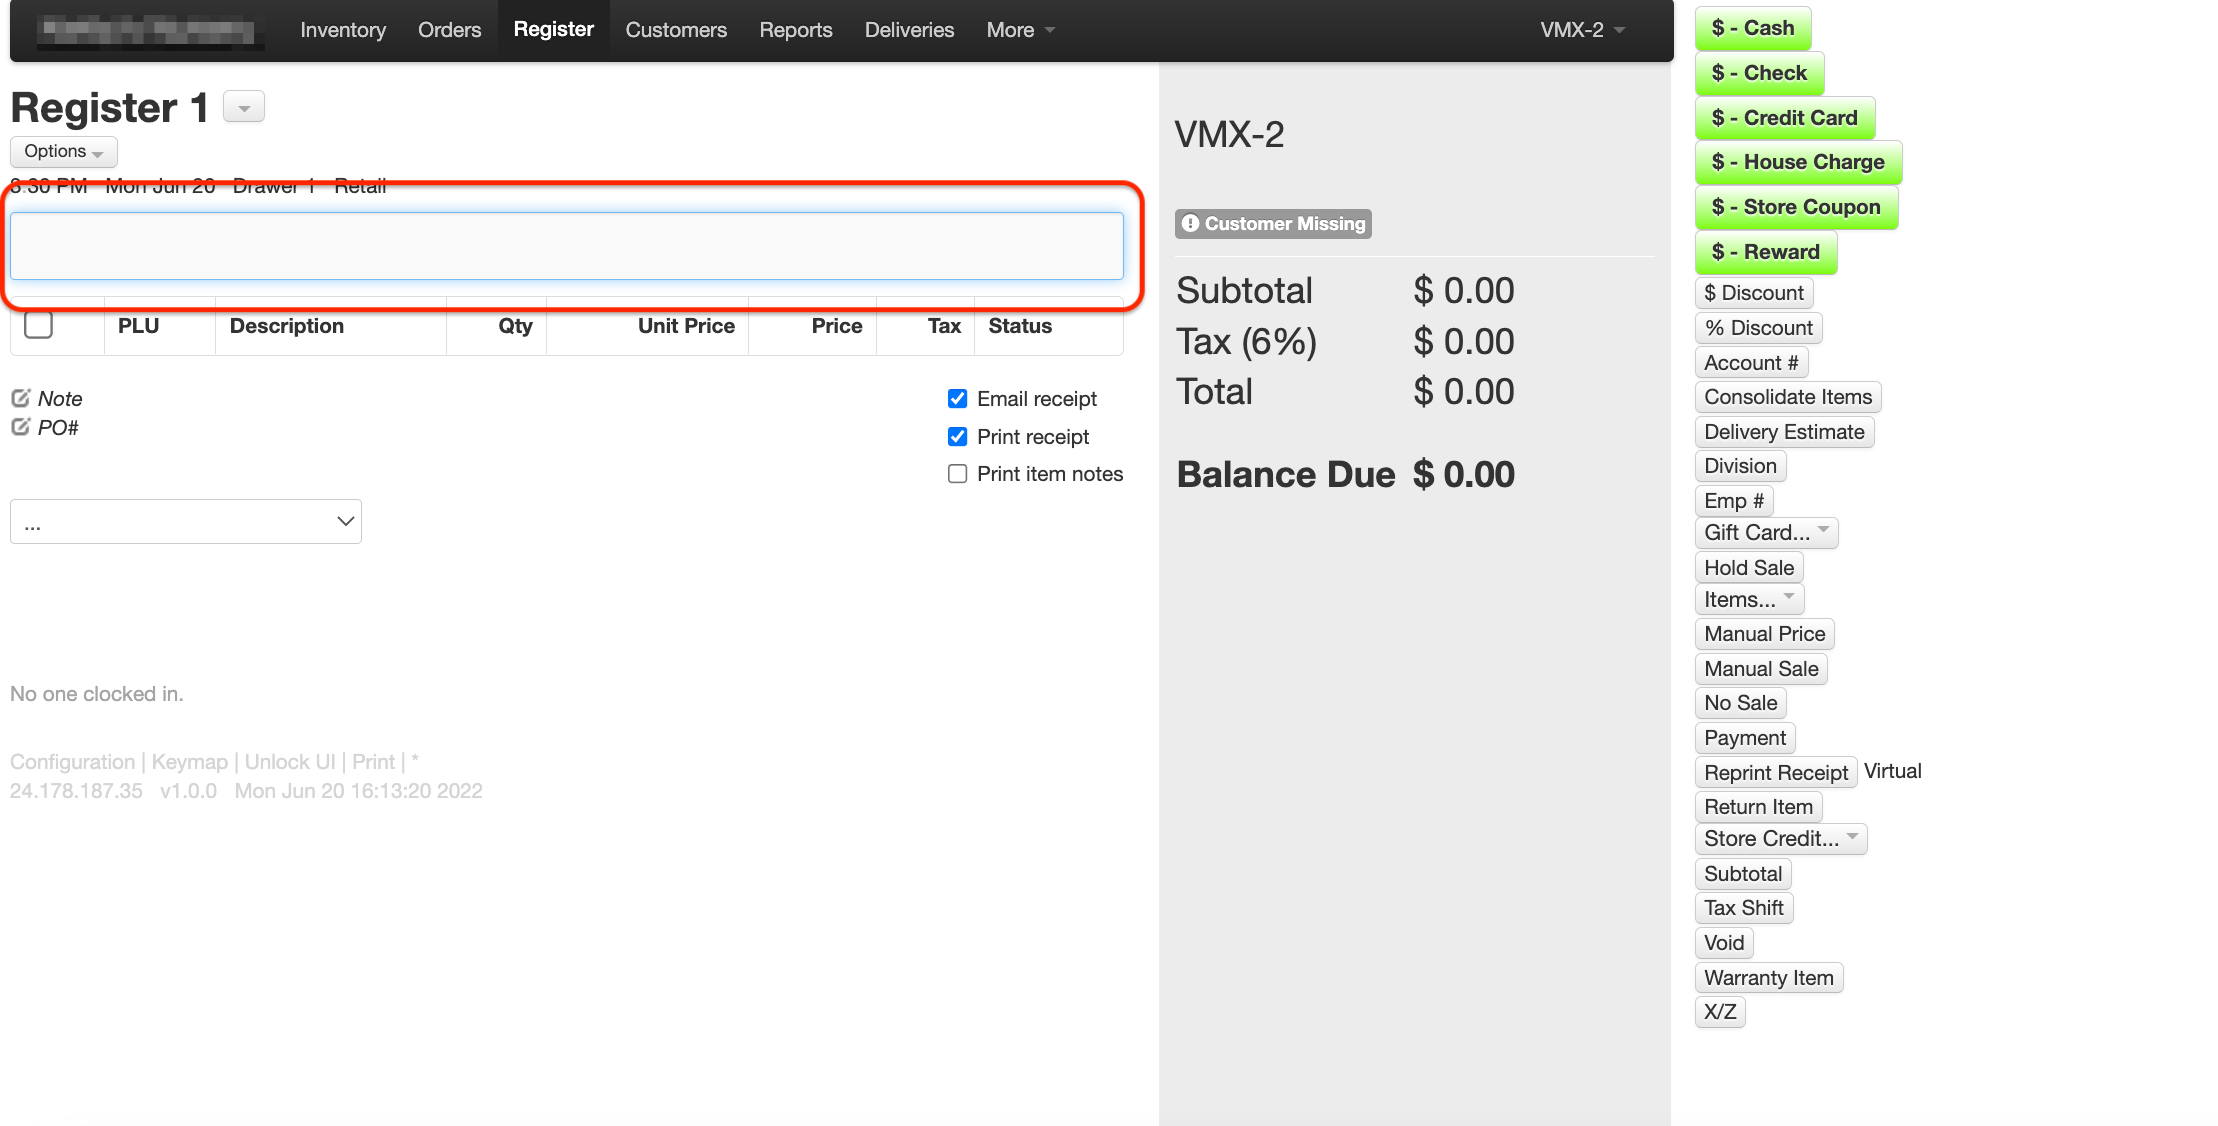
The search bar is a great place to quickly lookup inventory from a customer's request. typing in the name of the requested item will automatically search your store's inventory. If your store has multiple locations, a side panel will appear to show you the inventory of the selected item at other locations. The register search bar is the central input area on the Register screen. It will intelligently search all inventory items for matches and then search the customer database.
Register Shortcuts!
Info
You can enter information like name, PLU, size, phone number, address, and more to get a successful match.
There are also a few helpful keys that narrow the register search:
| Key | Description |
|---|---|
| D: "department" | filters search by only including items in the department entered |
| Q: "number" | filters by items with a specific quantity ex- Q: 5, will only include items with a quantity of 5 |
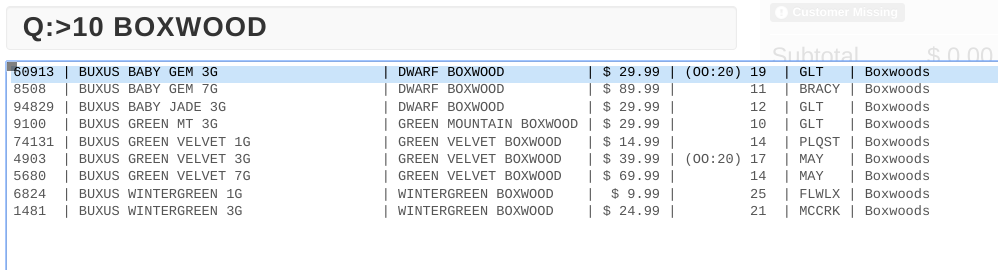
| Q: > "number" | filters by items with quantities greater than or equal to the number entered ex- Q:>10 BOXWOOD |
| Key | Description |
|---|---|
| Key | Description |
| Q:< "number" | filters by items with quantities less than the number entered |
| "space" 0 | shows items matching your search even if they are out of stock |
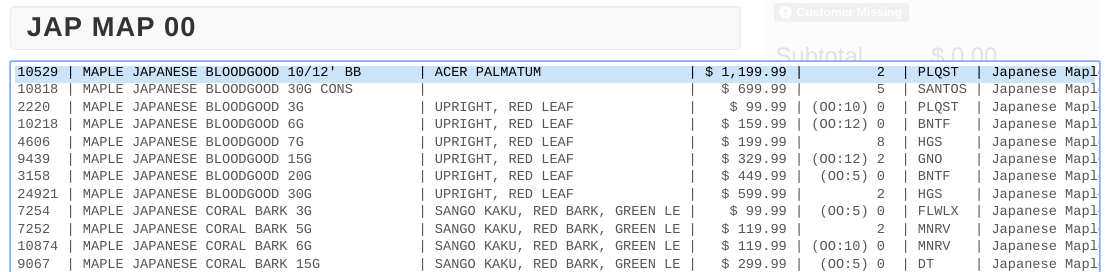
| "space" 00 | shows items matching your search if they are in stock or they are out of stock but have some on order ex- JAP MAP 00 |
| Description | |
|---|---|
| $: "number" | filters by items with a specific price ex- $:5, will only include items priced at exactly $5.00 (to the cent) |
| $:< "number" | filters by items with prices less than the number entered |
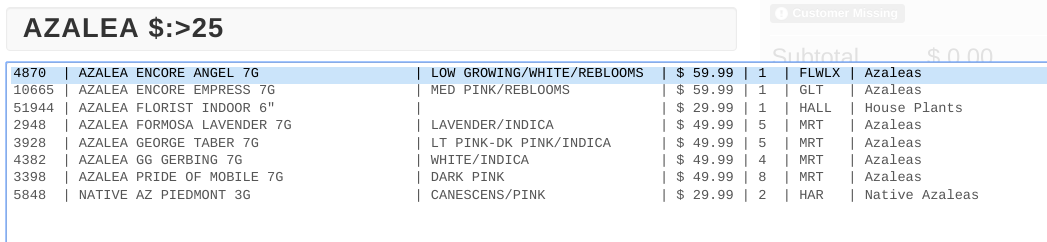
| $: > "number" | filters by items with prices greater than or equal to the number entered ex- AZALEA $:>25 |
Info
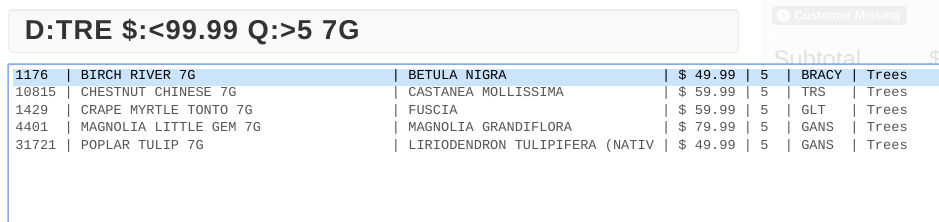
Any filtering keys can be combined! For example, you can search items in the Tree department that cost less than $99.99, have more than 5 in stock, and are in a 7 gallon pot: ⬇
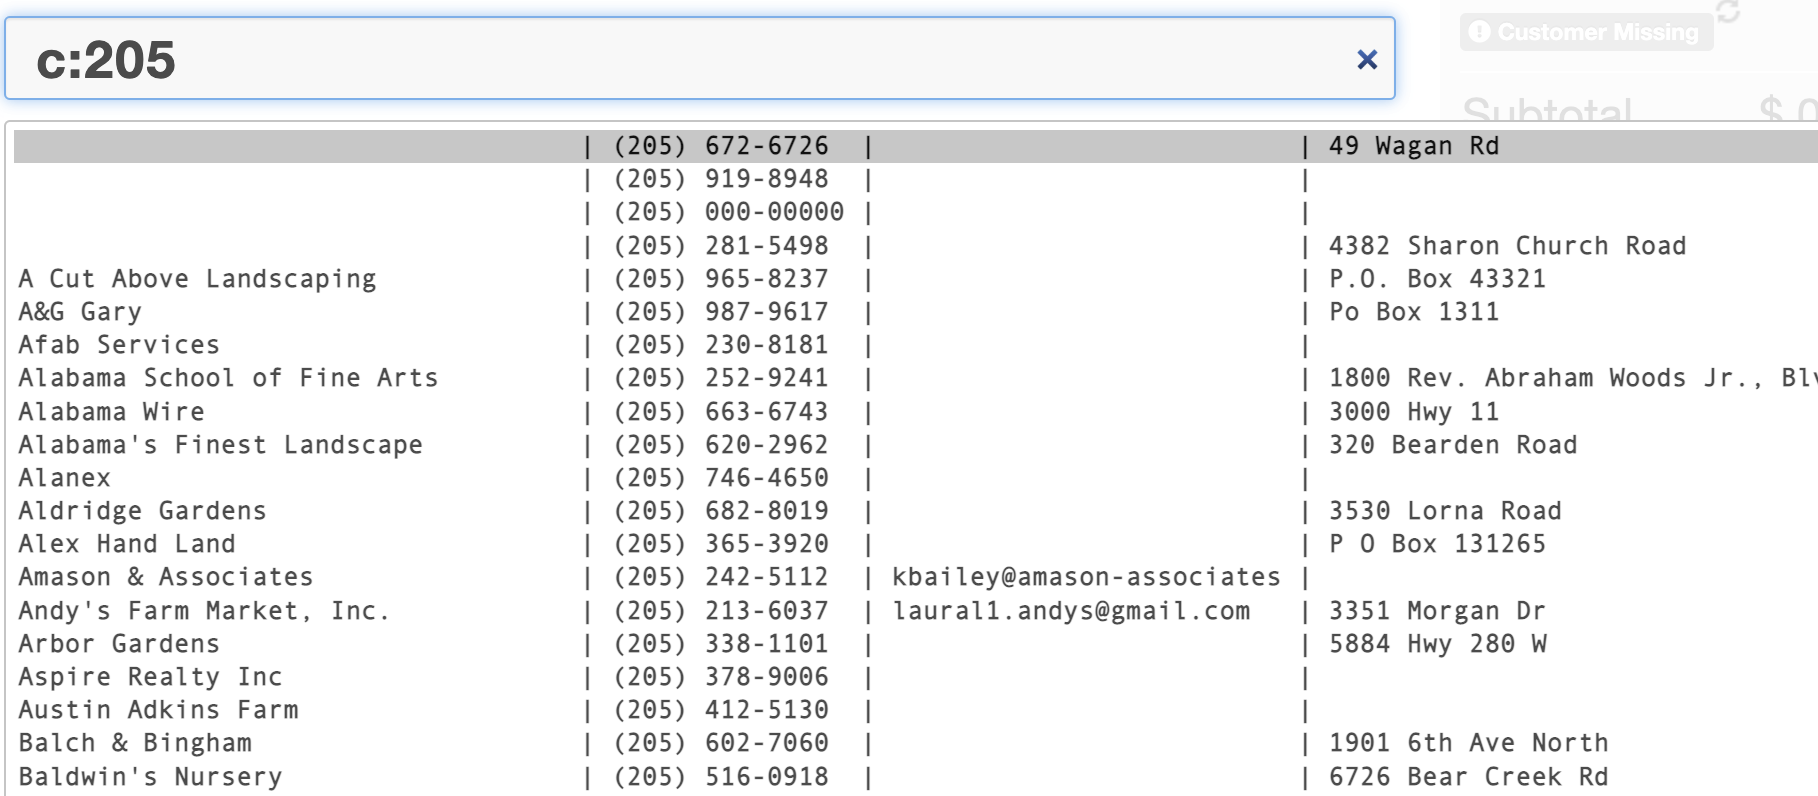
Also, to search exclusively customer records, use "C:". To search exclusively inventory items (skipping the customer search), use "I:".
Options
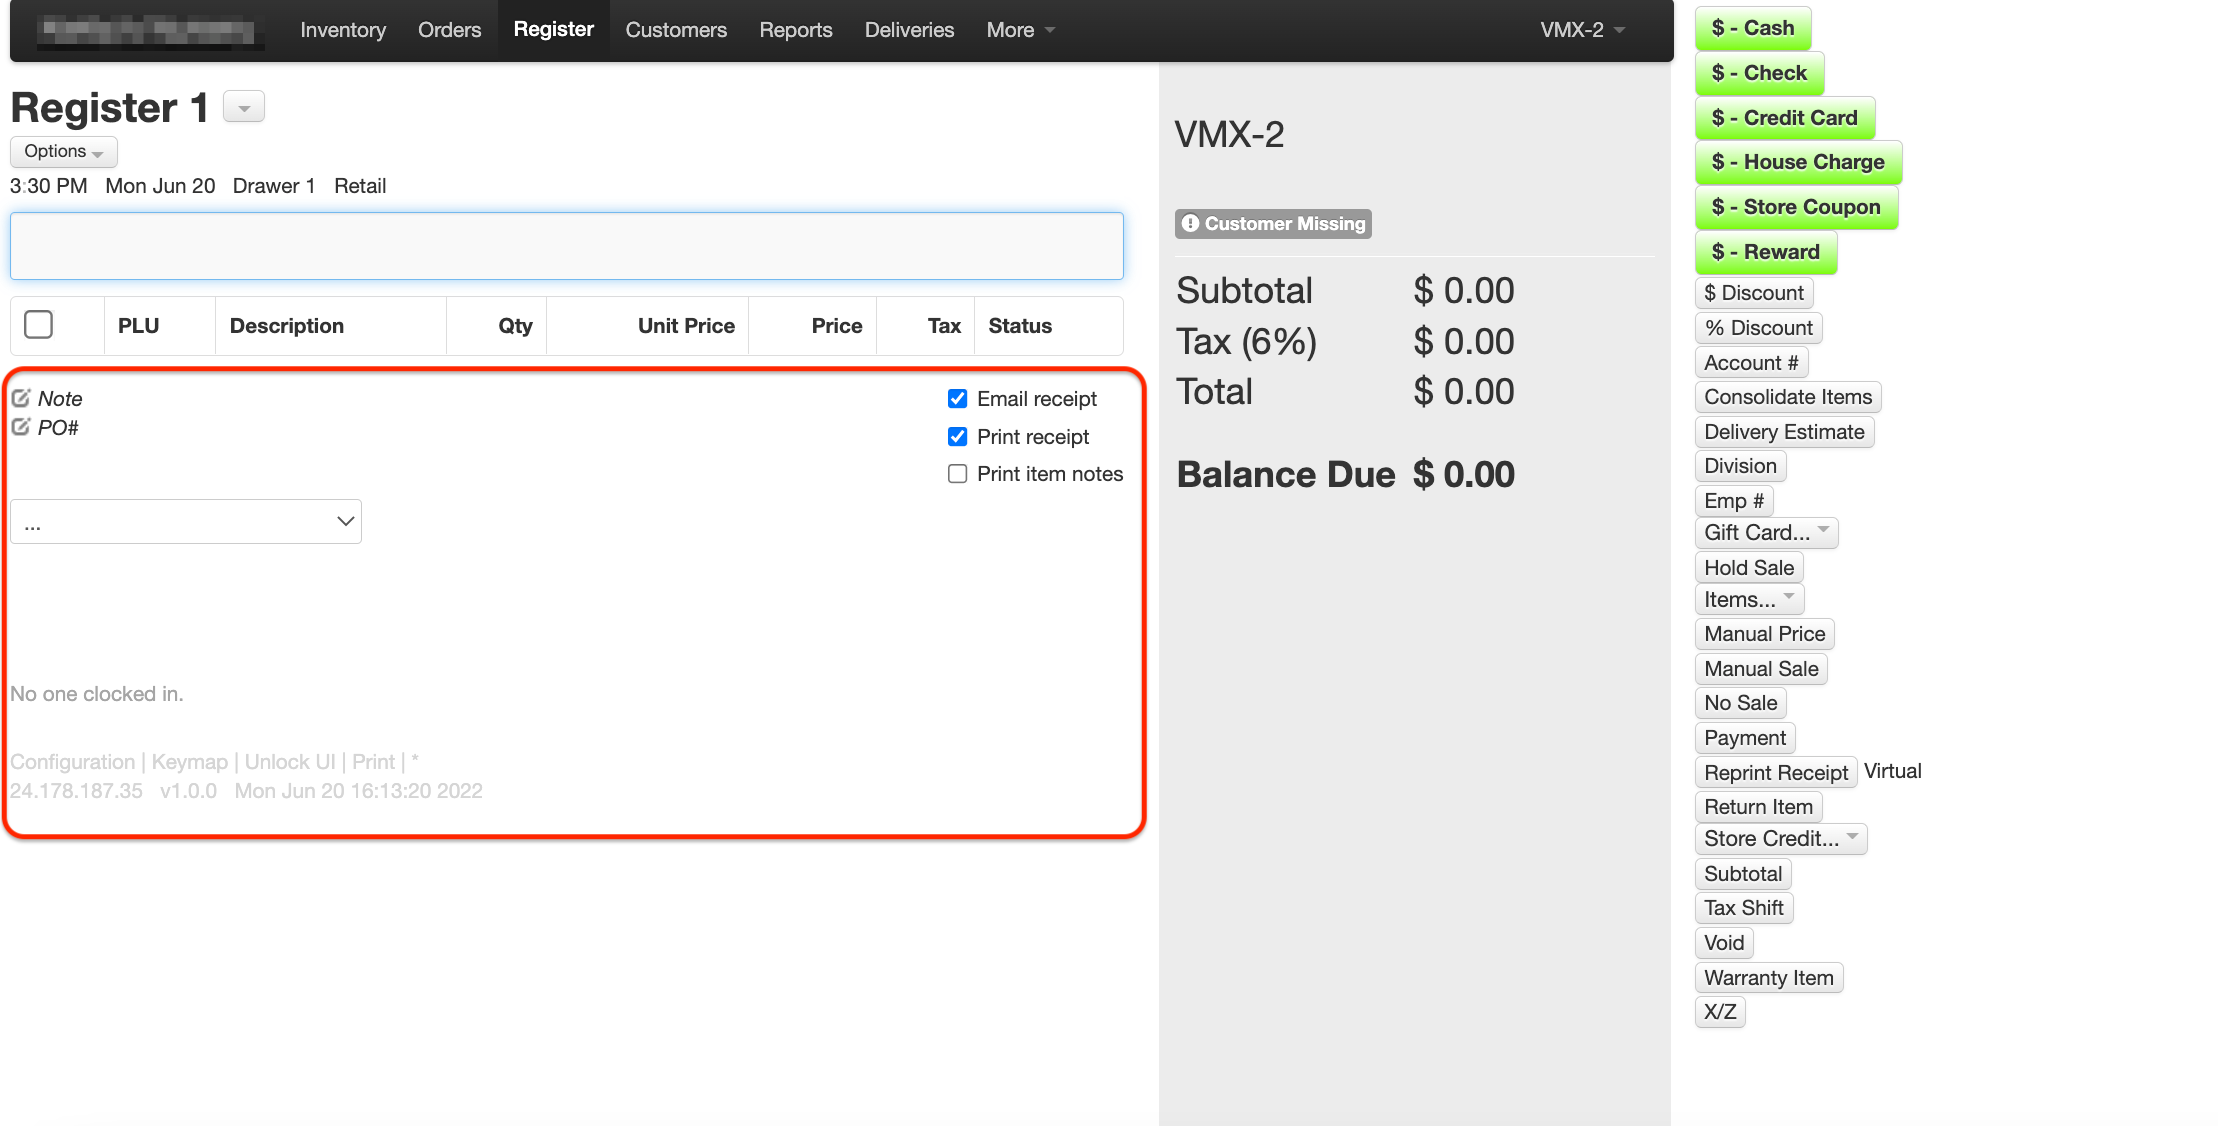
Receipt Notes or PO Number- Below the Items section, two toggle buttons are included to make an amendment to a receipt. You can add a note to include additional information to the receipt that a customer cannot see on their copy, and you can add a PO number to a customer’s receipt.
Email receipt, Print receipt, and Print item notes- the “Email receipt”, “Print receipt”, and "Print item notes" boxes can be checked and unchecked to include an emailed receipt, printed receipt, both, or neither or to include the notes made to items.
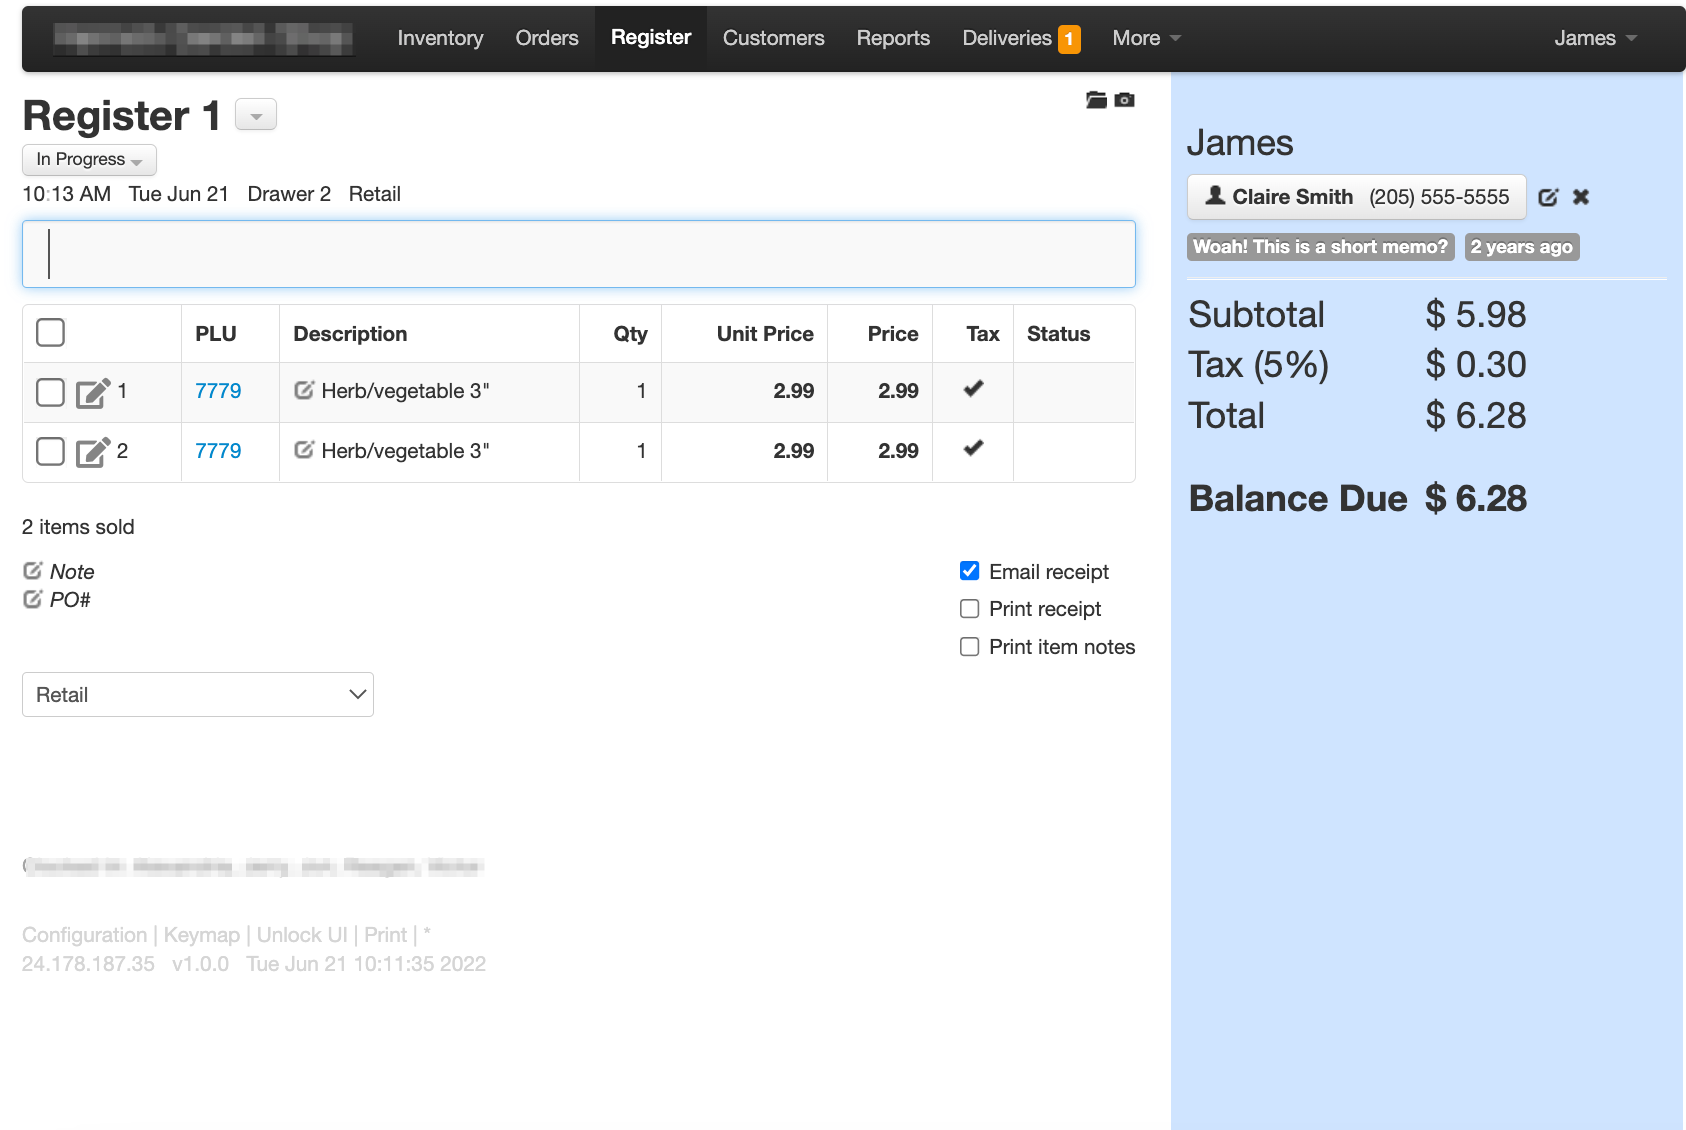
Customer Class (automatic discounts)- the dropdown below the receipt note area lets you apply one of your store's customer classes (pricing levels) to the sale — for example an Employee or Landscaper class, depending on how your store's classes are set up. The class's discount is applied automatically as you add items. Select None to remove it. On some stores this dropdown is managed automatically from the customer account and cannot be changed by hand.
Clocked in- if your business uses the VMX time clock, the bottom of the screen shows the names of the employees currently clocked in (refreshed about once a minute), or displays “No one clocked in.”.
Info
To return to the Configuration screen, select the grey word “Configuration” below the listed of clocked in employees at the bottom of the screen.
Additional Tools
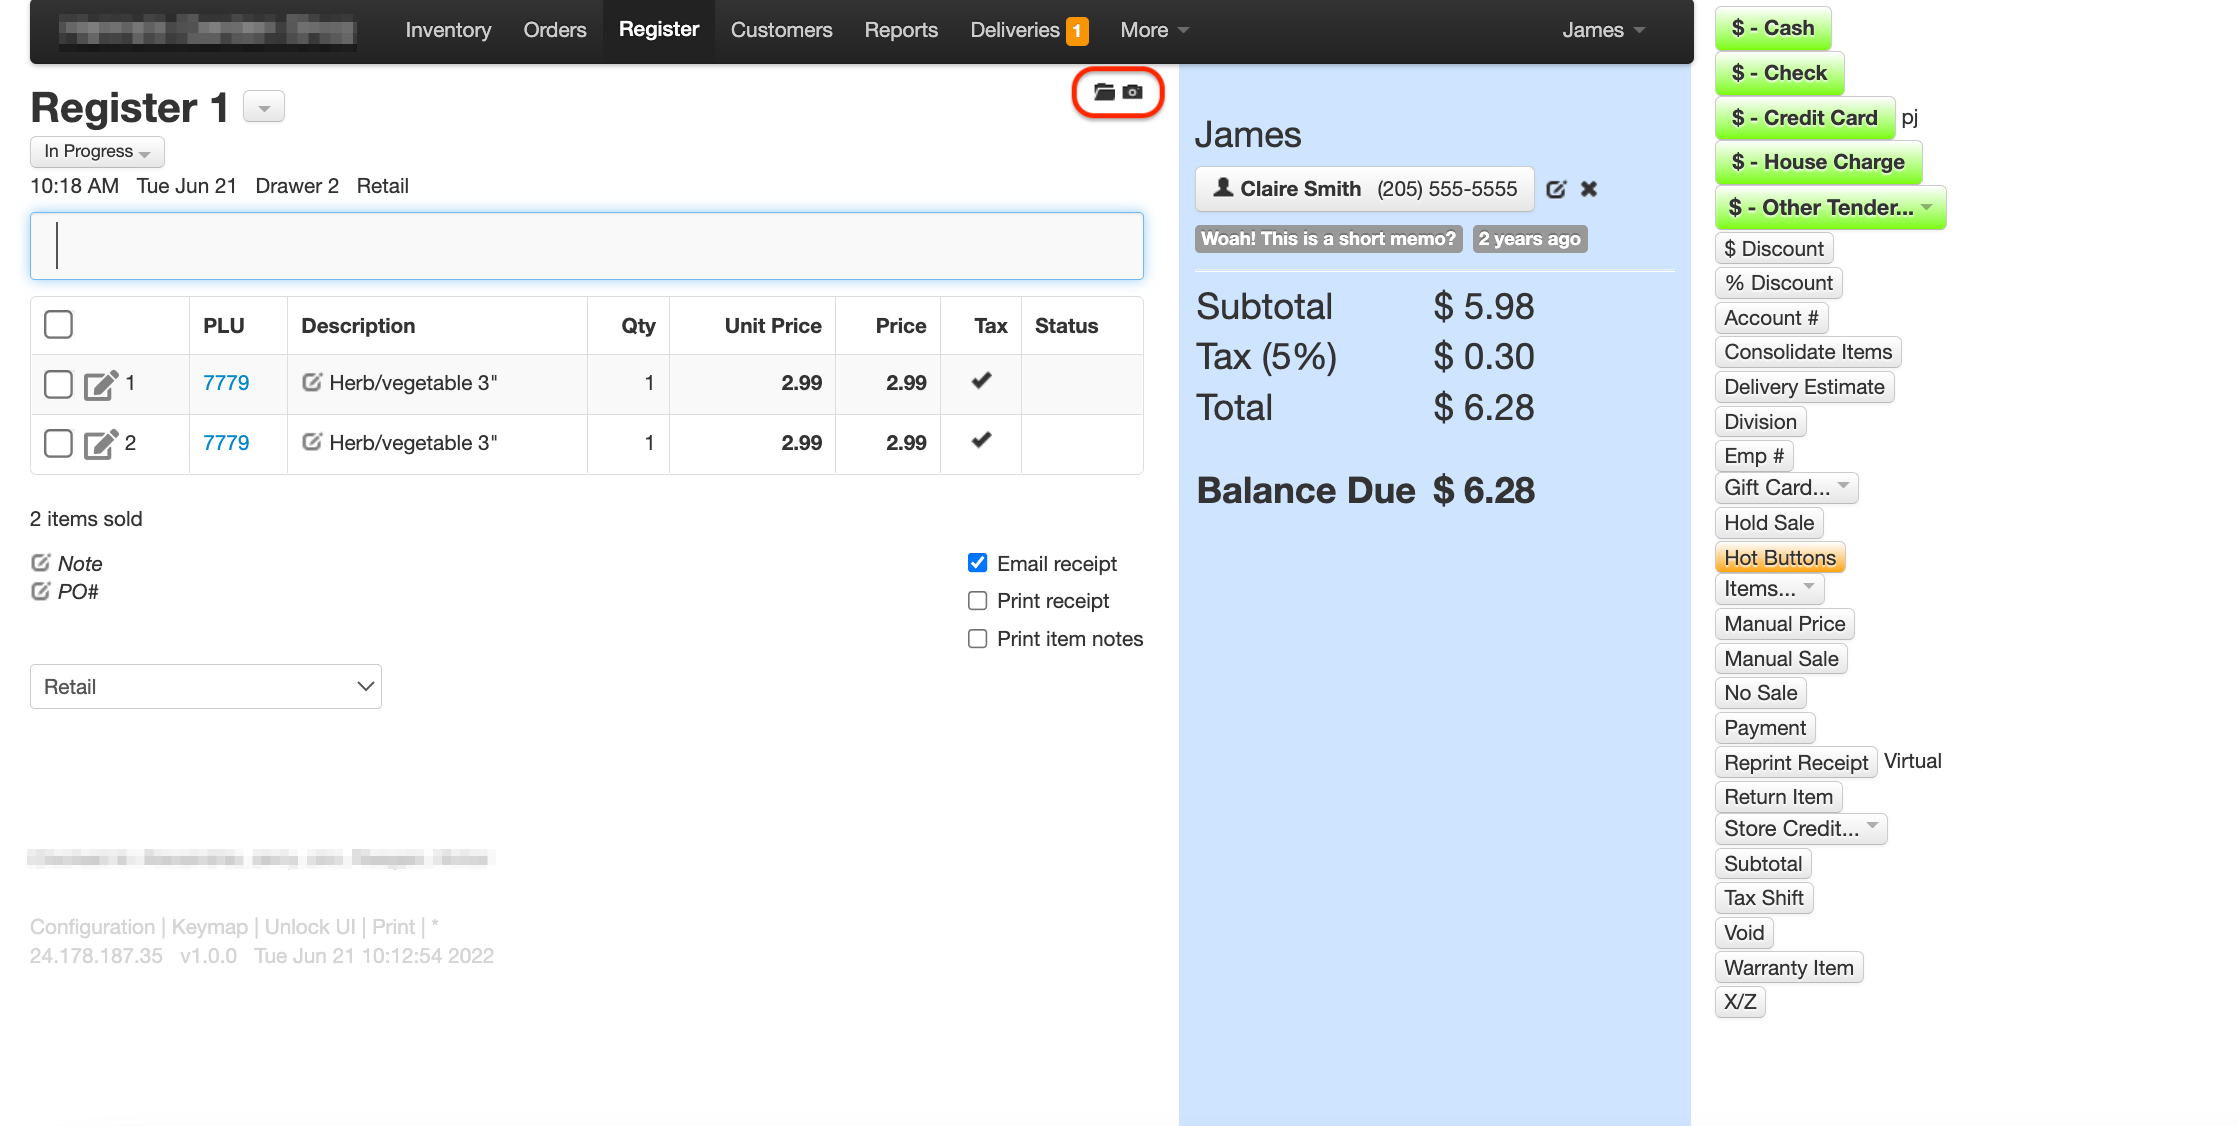
Cameras Page- If your business uses VMX camera integration, a camera icon appears at the top right of the screen; selecting it will redirect you to the Cameras page of the POS. This feature is enabled per-client by VMX — contact help@vmxllc.com if you'd like it.
Tender Section
Selecting the “Customer Missing” label at any point opens the Receipt Customer window, where you can enter a Customer Number or start typing a name and pick from the suggestions, then click Set to attach the customer to the sale. If a customer is already on the sale, you can select the pencil edit icon next to their name to change the customer, or (on a sale in progress) click the “x” icon to remove the customer but remain on the Register screen.
Info
For more information on how to navigate the Customer Search Page, click Here
Subtotal- This part of the Tender Section will display the subtotal of the items currently included in the sale. This section will reflect any discounts on the sale.
Info
For more information on how to navigate discounts, visit the Discounts Tutorial page.
Total- This part of the Tenders Section displays the total of the sale after all discounts, tax, and other amendments to the subtotal.
Balance Due- The Balance Due line of the Tenders Section will show the Balance still left to be tendered by the customer. Before any payment method is tendered, it will match the Total, and then show continuing balances as additional payment methods are added until the balance reaches zero or change is due.
Button Panel
The area to the right of the Tender Section is Buttons. These are essential to carrying out the various functions of the Register screen.
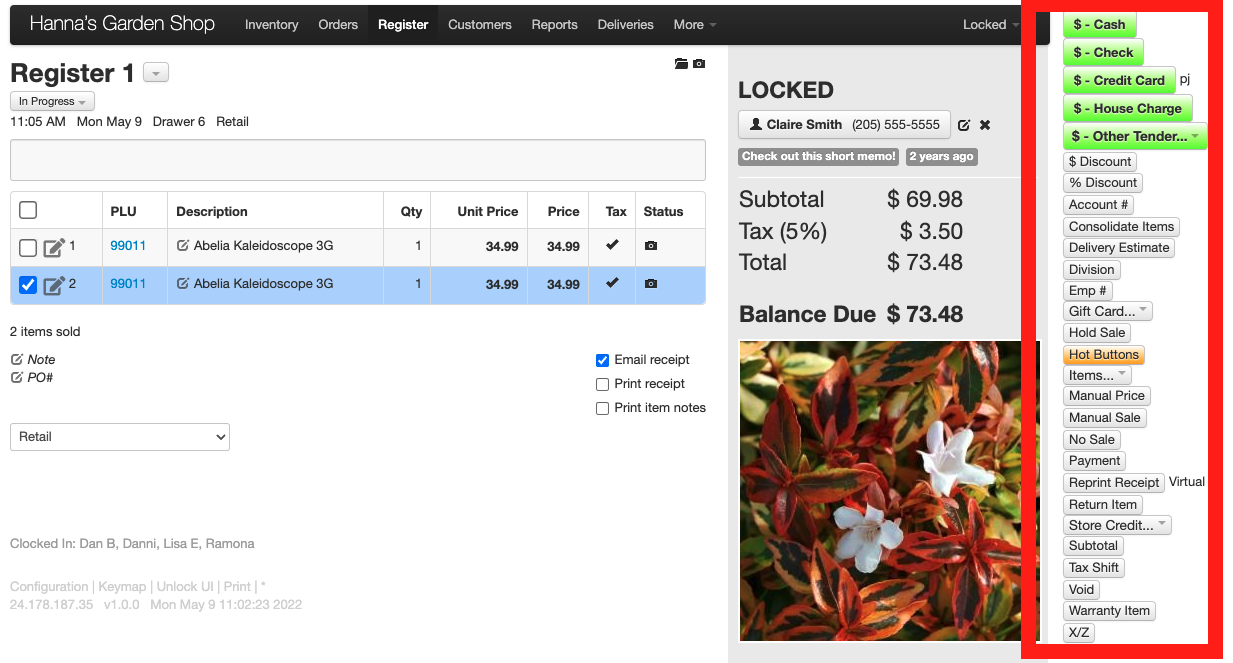
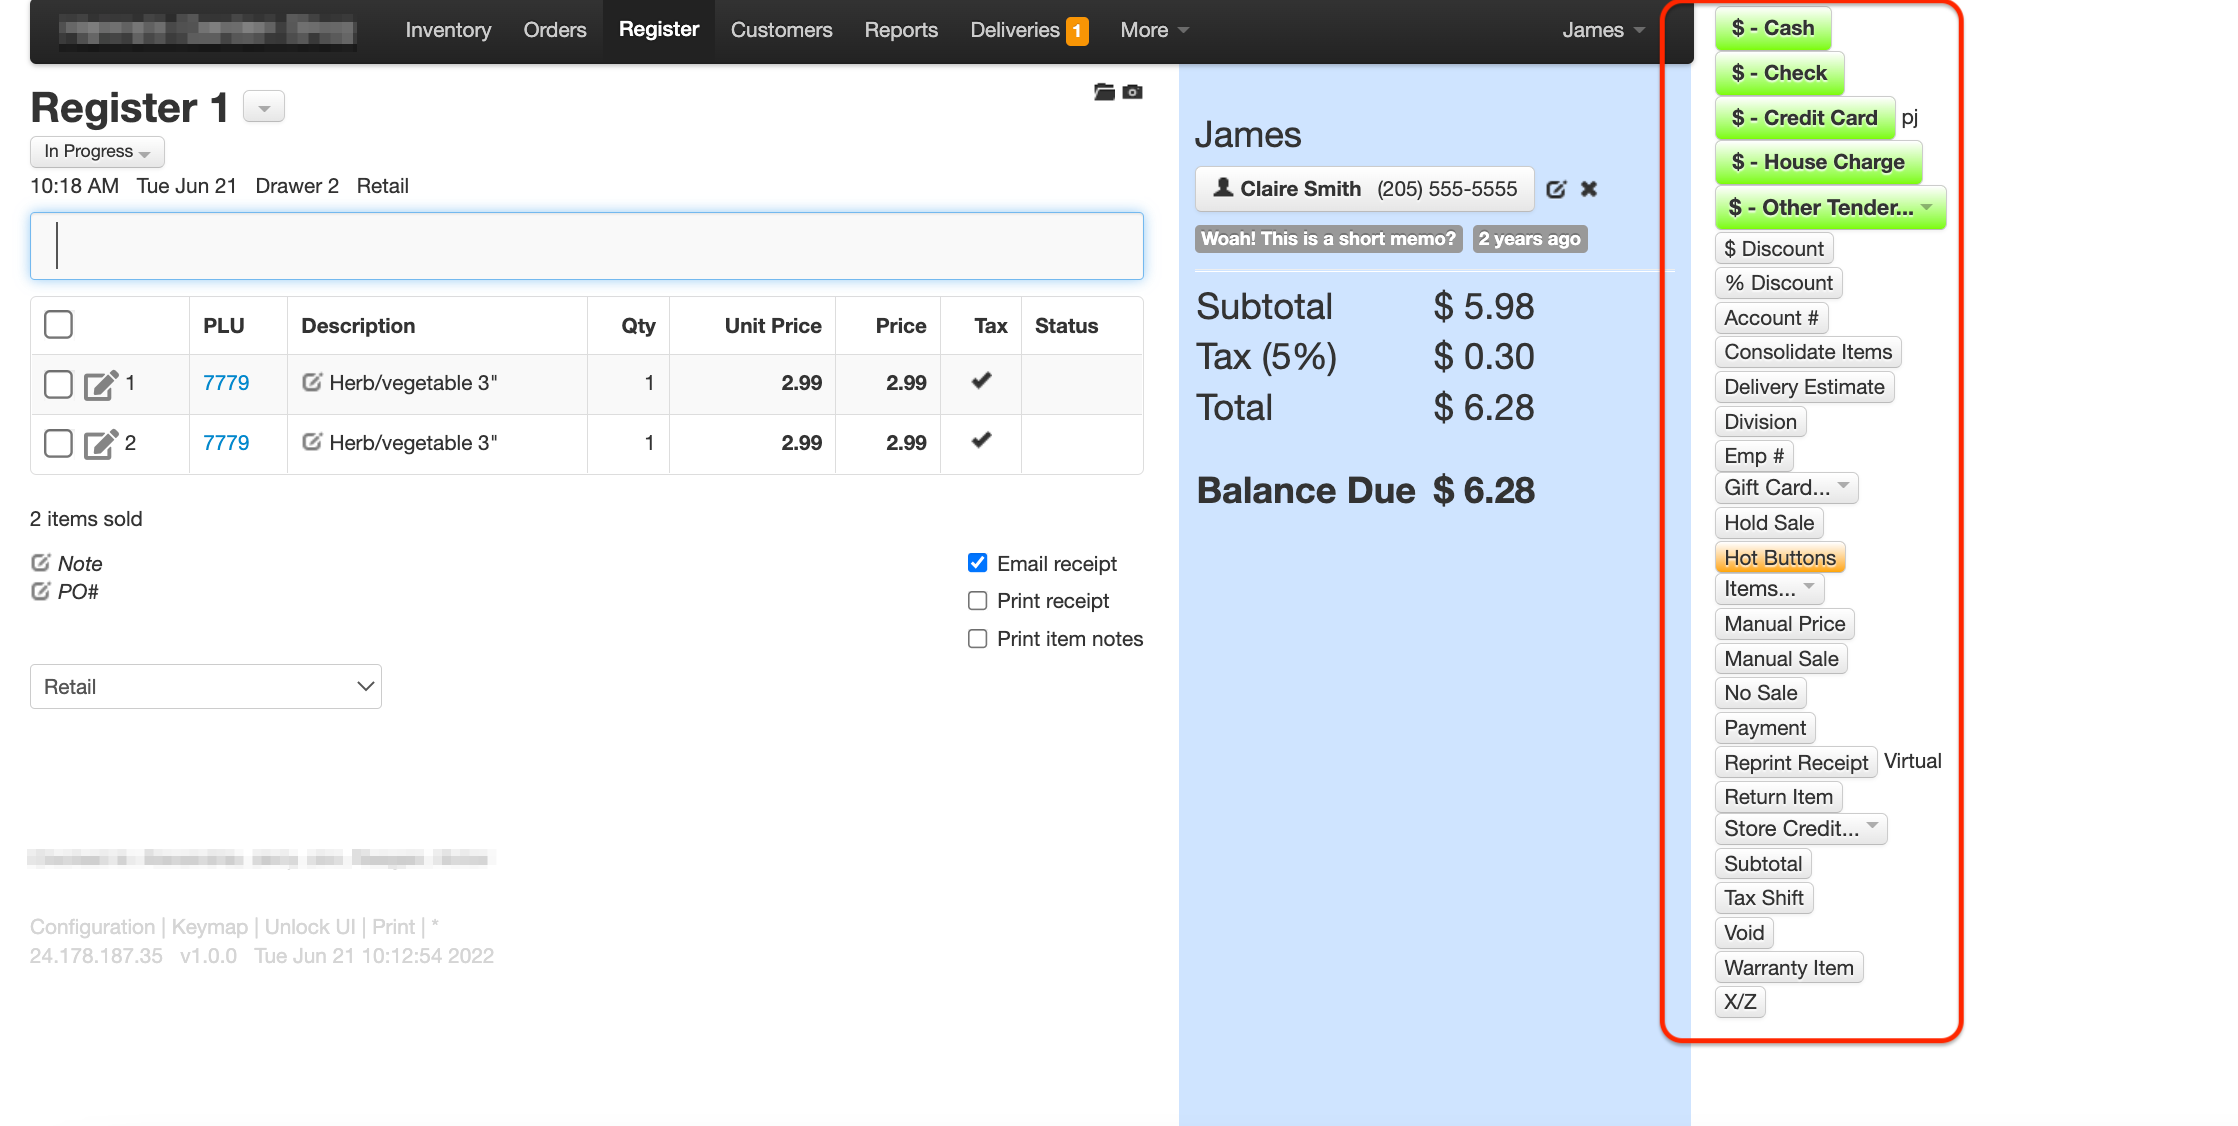
Cash- After entering an amount in the register search bar, click the “$ - Cash” button to complete the tender.
Check- After entering the amount the check was written for in the register search bar, click the “$ - Check” button to complete the tender and be prompted to enter the check number.
Credit Card- click the “$ - Credit Card” button to take a card payment (through your card terminal, or by entering card information manually). The tender amount is optional — leave it blank to charge the full balance due.
House Charge- click the “$ - House Charge” button to charge the balance due to a customer’s account. Alternative amounts can be entered into the register search bar if the customer wants to charge more or less than their balance due.
Other Tender- the “$ - Other Tender...” button opens a menu of the less-common tenders set up for your store. The exact list varies by store, and commonly includes:
- $ - Store Coupon- apply a store coupon to the sale (optionally enter the coupon amount first)
- $ - Credit Card (Web)- ring up a sale that was processed through your company's website
Discount- Type a percentage into the register search bar and select “% Discount” to discount the item(s) you have highlighted on the screen, or highlight the Tender Section to discount all the items in a sale. To discount by a dollar amount instead, enter the amount and select “$ Discount”.
Account #- type a customer name or number and select this button to attach the matching customer to the sale (if there are several matches, you are taken to the Customer Search page). With a customer already attached, selecting it with an empty search bar removes the customer; with nothing entered, it opens the Customer Search page.
Consolidate Items- Select this button to consolidate items added to a sale that have the same PLU. This will make the receipt easier to read for the customer.
Info
This can also happen automatically — turn on the "Consolidate duplicate items?" switch on the Register Configuration screen.
Delivery Estimate- Select this button to estimate the cost of delivery with the mileage. The screen will prompt you to add the customer’s address and then give you a price.
Division- Select this button to change the division of the store you would like to make a sale under.
Emp #- select this button after entering your employee number into the register search bar to log in.
Gift Card...
- Pay With- the “Pay With” option should be selected after entering the desired amount to use a gift card to tender a sale.
- Sell/Return- After typing the amount of money the customer would like to issue the gift card for, the “Sell/Return” button should be selected. You will then be prompted to enter a gift card number. (To return a gift card, select Return Item first.)
- Usage History- Use this button to check the amount left on a gift card. The button will prompt you to enter the gift card number to access history.
Hold Sale- Using this button while a sale is in progress will put a sale on hold to be rung up at a later time. Using this button on an empty Register screen will redirect you to the Held Sales page
Info
With no items rung up, another way to get to the Held Sales page is to highlight the Tender Section of the register screen and click the down arrow on your keyboard.
Tip
For more information on Held Sales click here.
Hot Buttons- If your store has hot button items set up, this button will display options for commonly sold items to make them faster to ring up.
Items...
- Add to PO- Select this button to add all of the items you have rung up on a sale to a purchase order. Enter the PO# to add them to, or choose New PO and pick the vendor. Next, choose which cost goes on the PO lines:
- Vendor List Cost — the List Cost set for that vendor on each item's Ordering tab. Items with no List Cost for that vendor use their last received cost. The dialog shows how many of the items have one.
- Last received cost, Average cost, or Retail price.
A preview under the choices shows the cost each item will get. Cancel stops without adding anything (a New PO is only created once you confirm). 2. Add Tags- This button will add the rung up items to the tag queue. 3. Make Combo!- This button takes multiple items and combines them into a single item for sale. * For more on this, visit the Combo page 4. Group- Select this button to group several items on an invoice. 5. Create Reservations- This button allows you to reserve items that are rung up. 6. Convert to Payment- This button will convert the item/s highlighted to payments that will be credited to a customer’s account. This feature is commonly used when a customer is pre-paying for items. 7. Trash- This button takes all of the items rung up on the screen out of inventory at the quantities you rang them up (for damaged or discarded product). You'll be prompted for a note, and the Edit Inventory permission is required. 8. Store Use- This button takes the items rung up and sets them aside for use in the store (not for sale). 9. Set Counts- Selecting this button allows you to set inventory counts for items that are rung up. The Edit Inventory permission is required. 10. Contractor Tax- Adds a TAX line for the tax you owe on the cost of the materials on the ticket and takes retail sales tax off the sale. For landscape and contractor jobs where you pay use tax on your cost rather than charging sales tax on the retail price. See Contractor Tax below. This feature is enabled per-client by VMX — contact help@vmxllc.com if you'd like it.
Manual Sale- To manually sell an item without a PLU, enter the desired price, select the “Manual Sale” button and then enter the item description to print on the receipt.
No Sale- Open the cash drawer without a cash or check transaction taking place (permission required).
Payment- select this button after entering an amount into the register search bar to create a line item for a payment to customer’s account.
Reprint Receipt- when on a completed sale page, this button will reprint the receipt. When on a sale in progress, this button will print a quote.
Return Item- Select this button and then ring up an item as usual — the item is added to the sale as a return instead of a sale.
Tip
Return Item (Validated)- Track your warranty and return items by attaching a previous receipt to a returned item using this button to keep your customer's transactions organized in their history. See Validated Returns. This feature is enabled per-client by VMX — contact help@vmxllc.com if you'd like it.

Subtotal- This button will highlight the Tender Section of the Register screen.
Tax Shift- This button will add or remove tax from a sale in progress.
Void- This button will delete highlighted item/s from a sale in progress.
Info
Another way to void items on a sale in progress is to highlight an item and then click the Delete button on your keyboard.
X/Z- This button opens and closes registers. If no drawer is assigned yet, it lets you select a drawer to open the register. With a drawer in use, it shows a Z Drawer popup with three choices: X prints an X tape so you can see and confirm the running totals without closing anything; Z prints the tape, clears the totals, and closes out the drawer; Cancel does nothing. See Opening and Z-ing Registers for the full end-of-day workflow.
Contractor Tax: tax on the cost of materials for contractor jobs
Some stores do not charge retail sales tax on landscape or contractor jobs. Instead they owe use tax on what the materials cost them and pass that amount through to the customer as its own line. The Contractor Tax button under Items... on the Register does that calculation for you. This feature is enabled per-client by VMX — contact help@vmxllc.com if you'd like it.
To add contractor tax to a sale:
- Ring up the items for the job as usual.
- Click Items... and then Contractor Tax.
- A line for the item TAX is added to the sale. Its price is the cost of every item on the ticket (your cost times the quantity sold) multiplied by the register's sales tax rate, rounded to the penny. The line note shows the cost and the rate used, for example "Contractor tax on $412.50 cost @ 9%".
- Retail sales tax is switched off for the sale at the same time, so the customer is charged the TAX line and not sales tax on the retail price.
- Tender the sale as usual.
If you add or remove items after pressing the button, press Contractor Tax again. It recalculates and replaces the existing TAX line rather than adding a second one. Returned items reduce the cost total.
The message NO COST ON TICKET means the items rung up have no cost recorded (or the returns cancel out the sales), so there is nothing to tax. Check the item's cost in Inventory and try again.
Contractor Tax is not available while tendering or when the register is locked. The TAX item must exist in Inventory for the button to work; VMX sets it up when the feature is switched on.