Account Wish List
Wish List- The Wish List tab is used to organize the item requests for the customer.
Info
To see a comprehensive list off all Wish List items, visit the Wish List page.

Adding Item Requests
Select the "+ New Request" button to add a new request. For information on how to add a new request, visit the Add to Wish List page.
Existing Wish List Table
PLU
Lists the item number of the product requested.
Description
The name, size and price of the product requested.
Department
The name of the department the requested product is in. Department can also be specified if the customer wants to request a product that does not have an item number or has never been received.
Quantity
This field shows the number of items the customer would like, or reads "Fulfilled" after the request is completed.
On Hand
This field lists how many of the requested items are in stock in inventory.
On Order
This field lists how many of the requested items are on an order.
Added By
These fields show the date the Wish List item was added and by what employee.
Note
This field will show any notes added to the Wish List.
Last Activity
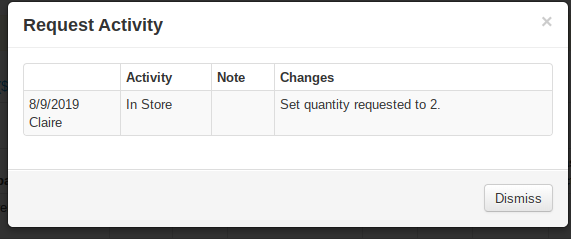
This field will show you the date of last activity for the wish list item. It will include any changes made to the wish list or Actions taken. You can clicked the hyperlinked date to see the history of Actions taken on the customer's wish list or any changes made to the request.
Next Step
This field lists the next Action to be taken based on the employee's updates.
Followup
This field allows you to set a date to followup with the customer, or take appropriate action in order to fulfill the request.
Edit
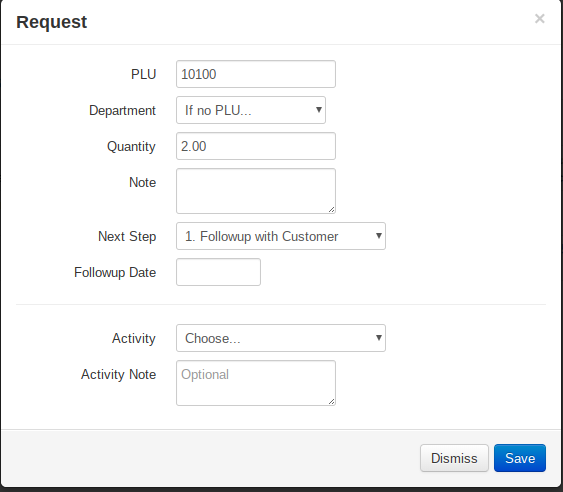
By selecting the edit icon at the end of the Wish List line, you can edit the Request details in a modal dialogue like the one above.
You can enter the PLU or the department if the requested item has never been received. If you enter only a PLU, the department field will be automatically populated.
Enter the quantity of the item the customer would like to request.
Add a note or specifications the customer makes on their request.
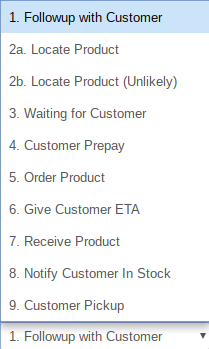
The drop down menu shown above lists possible next steps for this item. This allows all employees to stay up to date on the status of the wish list. You can also apply a followup date to the step to prioritize different items.
Activity
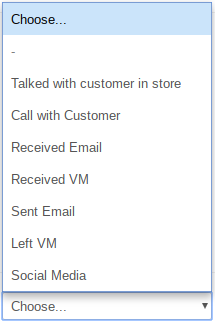
Activities create a timeline of everything that has happened with a request. This is valuable for keeping all employees on the same page and for documenting your efforts if a customer later disputes what happened.
Automatic activities are recorded when:
- The request is created
- Fields are changed (e.g., quantity updated from 10 to 20)
- The request is fulfilled, archived, or deleted
Manual activities are recorded by clicking the edit icon and scrolling to the Activity section at the bottom. Choose an activity type (phone call, voicemail, email, in-person, etc.), add notes explaining the interaction, and save. This is especially important before archiving a request — documenting that you called three times and left voicemails gives your team a clear record if the customer returns later.
To view the full activity history for any request, click the blue hyperlinked date in the Last Activity column.
Delete
The trash icon will delete the request and all its history. You will be asked to confirm before the deletion is final. Once deleted, there is no record that the request ever existed — use Archive instead if you want to keep the history.
Fulfill
Select the check mark icon to mark the request as complete. This can also happen automatically: when a customer with an open Wish List request purchases the requested item at the register, VMX will prompt the cashier to fulfill the request. The customer does not need to "load" the request onto the register — the system matches the customer account and item number automatically.